82 lines
2.8 KiB
Markdown
82 lines
2.8 KiB
Markdown
# Visualizing representations with t-SNE
|
|
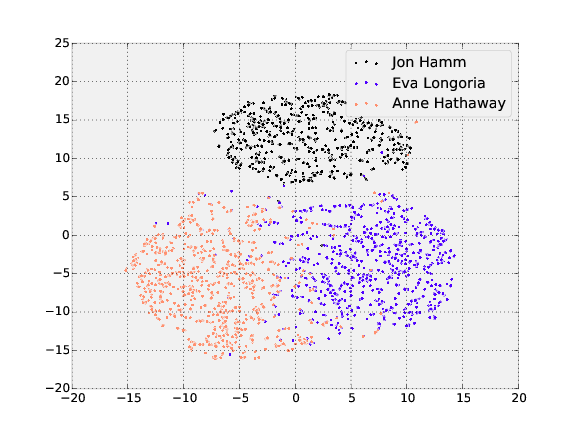
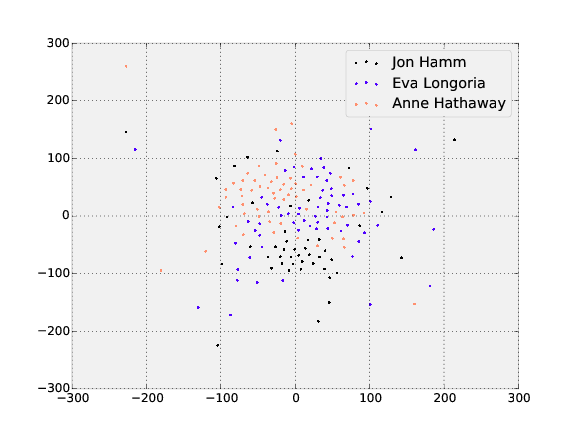
[t-SNE](http://lvdmaaten.github.io/tsne/) is a dimensionality
|
|
reduction technique that can be used to visualize the
|
|
128-dimensional features OpenFace produces.
|
|
The following shows the visualization of the three people
|
|
in the training and testing dataset with the most images.
|
|
|
|
**Training**
|
|
|
|

|
|
|
|
**Testing**
|
|
|
|

|
|
|
|
These can be generated with the following commands from the root
|
|
`openface` directory.
|
|
|
|
## 1. Create raw image directory.
|
|
Create a directory for a subset of raw images that you want to visualize
|
|
with TSNE.
|
|
Make images from different
|
|
people are in different subdirectories. The names of the labels or
|
|
images do not matter, and each person can have a different amount of images.
|
|
The images should be formatted as `jpg` or `png` and have
|
|
a lowercase extension.
|
|
|
|
```
|
|
$ tree data/mydataset-subset/raw
|
|
person-1
|
|
├── image-1.jpg
|
|
├── image-2.png
|
|
...
|
|
└── image-p.png
|
|
|
|
...
|
|
|
|
person-m
|
|
├── image-1.png
|
|
├── image-2.jpg
|
|
...
|
|
└── image-q.png
|
|
```
|
|
|
|
|
|
## 2. Preprocess the raw images
|
|
Change `8` to however many
|
|
separate processes you want to run:
|
|
`for N in {1..8}; do ./util/align-dlib.py <path-to-raw-data> align outerEyesAndNose <path-to-aligned-data> --size 96 & done`.
|
|
|
|
If failed alignment attempts causes your directory to have too few images,
|
|
you can use our utility script
|
|
[./util/prune-dataset.py](https://github.com/cmusatyalab/openface/blob/master/util/prune-dataset.py)
|
|
to deletes directories with less than a specified number of images.
|
|
|
|
## 3. Generate Representations
|
|
`./batch-represent/main.lua -outDir <feature-directory> -data <path-to-aligned-data>`
|
|
creates `reps.csv` and `labels.csv` in `<feature-directory>`.
|
|
|
|
## 4. Generate TSNE visualization
|
|
Generate the t-SNE visualization with
|
|
`./util/tsne.py <feature-directory> --names <name 1> ... <name n>`,
|
|
where `name i` corresponds to label `i` from the
|
|
left-most column in `labels.csv`.
|
|
This creates `tsne.pdf` in `<feature-directory>`.
|
|
|
|
# Visualizing layer outputs
|
|
Visualizing the output feature maps of each layer
|
|
is sometimes helpful to understand what features
|
|
the network has learned to extract.
|
|
With faces, the locations of the eyes, nose, and
|
|
mouth should play an important role.
|
|
|
|
[demos/vis-outputs.lua](https://github.com/cmusatyalab/openface/blob/master/demos/vis-outputs.lua)
|
|
outputs the feature maps from an aligned image.
|
|
The following shows the first 39 filters of the
|
|
first convolutional layer on two images
|
|
of John Lennon.
|
|
|
|

|
|

|